


GitHub is a cloud-based service that helps developers to manage their codes and version control using Git. Git is basically a version control system that holds the entire codebase and history available on every developer's computer which makes branching and merging very easy. As of now any developer can sign up and host a public repository for free as it is one of the open source projects.
You can visit and sign-up for GitHub here and for system application visit this website and download via git.scm
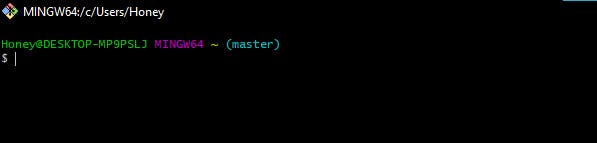
Once you download and install the git bash, the interface looks like this.
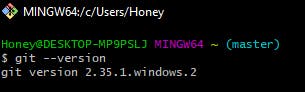
To check whether the latest build is installed or not type the following command
check version - git--version
CHEATSHEET
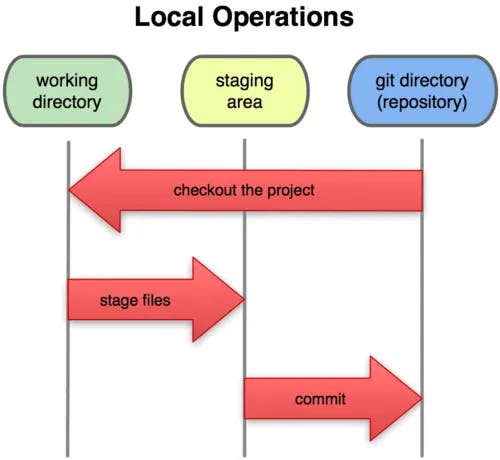
Now as we have installed the git-bash and are ready to upload or push the code to GitHub, here is the basic cheat sheet. These commands are common in most cases. These commands put the file/folder from Working Directory to Staging Area to finally Git Repository as given in the below diagram.
Now, as we are done with the theoretical part let's directly jump into the coding part where we are committing things locally and pushing them up into the cloud.
- Step 1
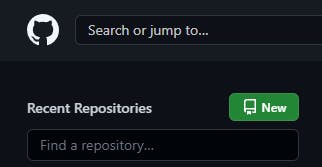
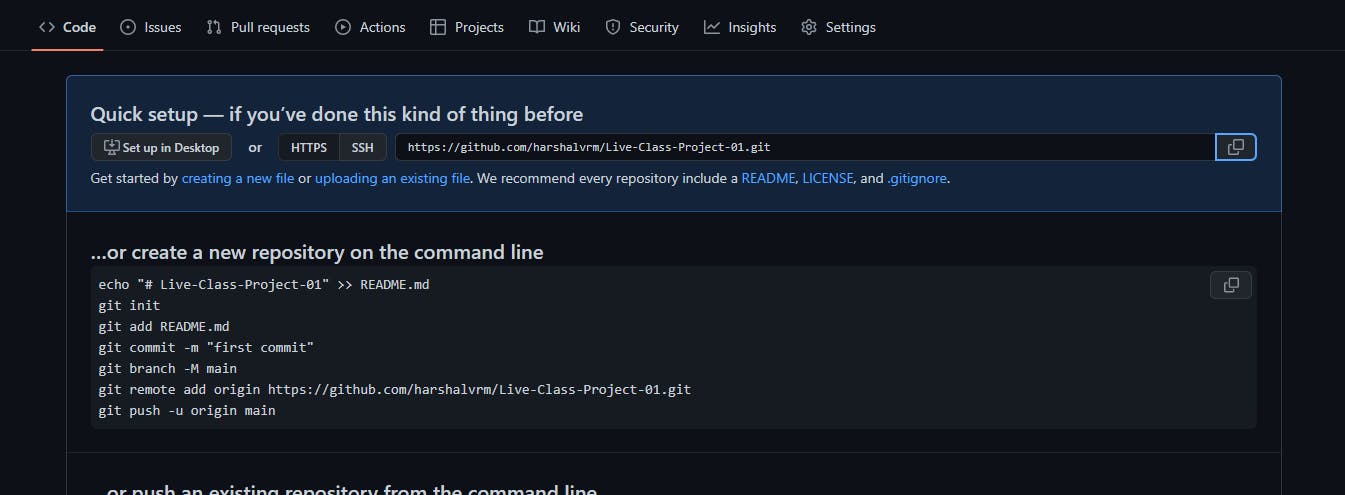
The first step is to create a repository in your GitHub account. The easiest way is open GitHub and clicks on the New button in the green.
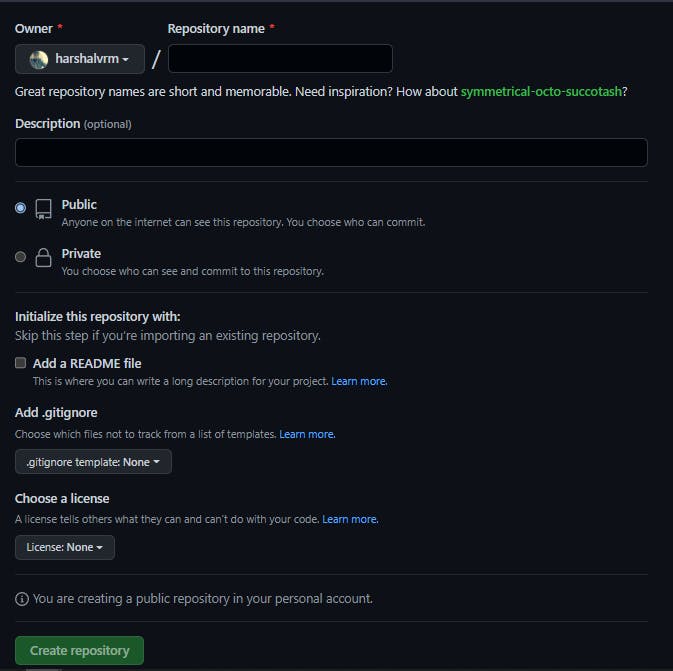
Once you clicked the button, the following information you have to add and afterwards click on the Create Repository option at the bottom.
Once you have created the repository, the next page will look like this.
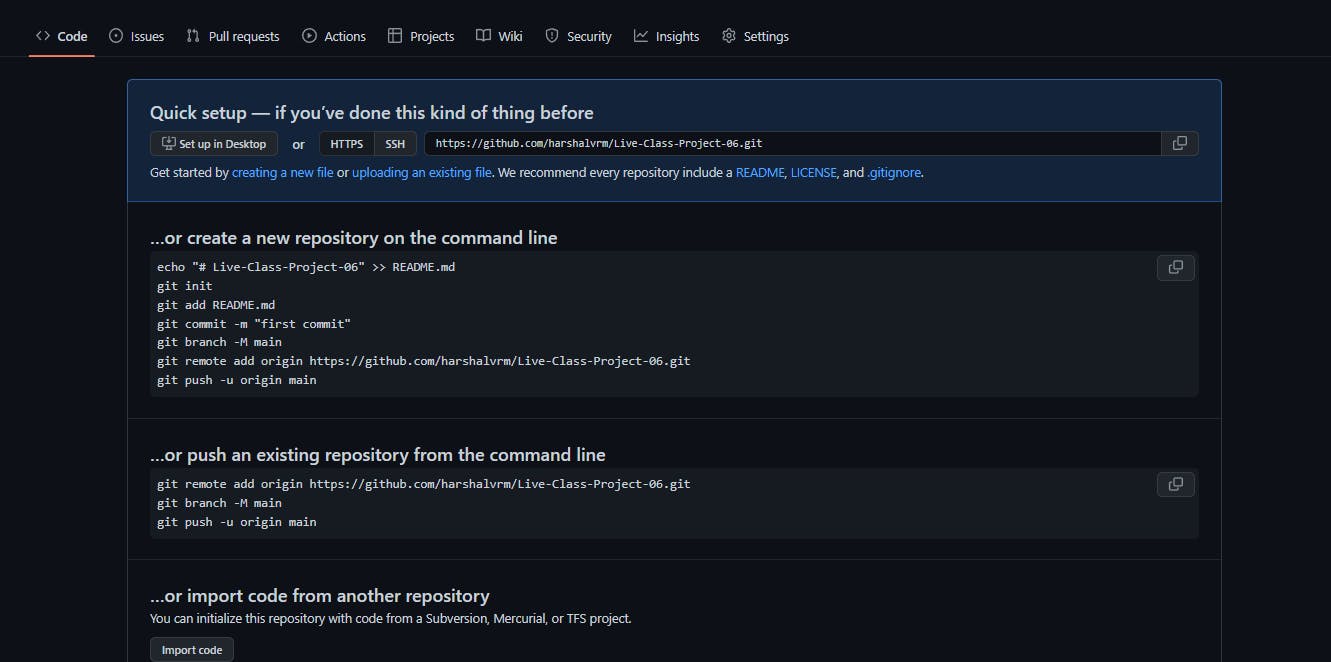
I would suggest keeping the mark of the HTTPS link given as it is going to be in use while pushing things to GitHub.
- Step 2
The next step would be to initialize git into your program's document or the folder you want to upload in the git. The basic command is to use the cd and ls command. Or you can visit this link to learn more about the command line.

To initialize git use the below command.
git init

- Step 3
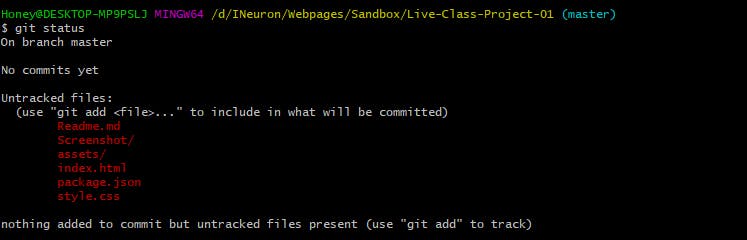
Once the git has been initializes check the status whether it has been initialized using the status command.
git status
- Step 4
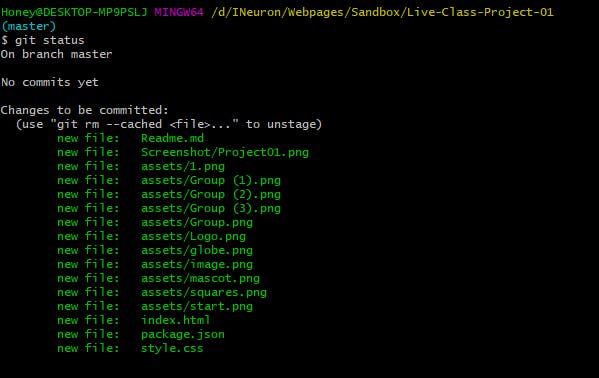
As we can see the git has been initialized, and it's time to select the folder/directory/file that needs to be pushed to GitHub. If you are pushing the entire folder the best option is to use this command.
git add .
Otherwise if you are about to push a specific file use this command instead.
git add "fileName"

- Step 5
This is not the next procedure actually but this is to crosscheck whether the entire folder or specific file has reached the staging area or not. All the green files mean that the files are in the staging area and ready to push into the cloud.
git status
- Step 6
The next step is to commit to your repository. 'Commits' are the snapshots of your entire repository at a specific time. Commits include a lot of metadata in addition to the messages like the creator, timestamp, comments, and many more.
git commit -m "Message/Notes/Comments"
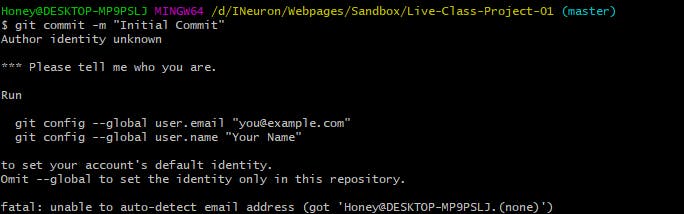
The command with the '-m' flag allows you to include the commit message at the same time as committing the process.
Without "-m", the default text editor(mostly VI or Vim) will be opened to create the commit message.
- Step 7
Identity Verification would be the next step in this process. Have you wondered that till now, no User Name or Password has been asked? In this way, anybody can commit and upload things to your GitHub account but that's not the case. Actually, GitHub works on a token concept or token authentication where you generate the token for a specific time period. But before coming to that, let's use the following command to tell your local host and git about your user name, email, and other credentials.
git config --global user.email "you@example.com"

git config --global user.name "Your Name"

- Step 8
Now, is the time to declare the remote location where your files should be sent to. Remember in the step 1, we had an HTTPS link of the GitHub that was generated just after we created our repository. Just copy the link as we are going to use the path with a remote command.
git remote add origin github.com/repository_location

- Step 9
Now, the final step would be to push your local repository to your remote repository via the particular command.
git push -u origin master
If you are a first-time user then, the pop-up will ask you about the token that we mentioned earlier. You have to initially generate the token from settings for a particular time period depending upon your requirement.
You can visit this link and go through the step-by-step process to generate the token.
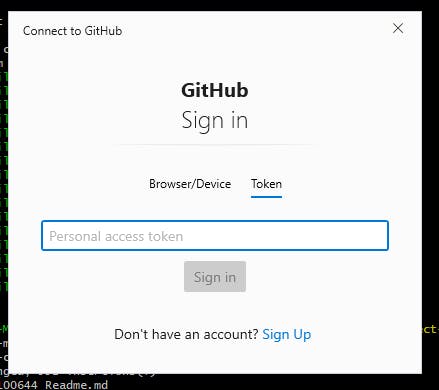
Once you put your token into the pop-up, this would be the last message that you will be seeing on your git bash. This message shows that all the contents have been successfully uploaded from the local repository to the remote repository.
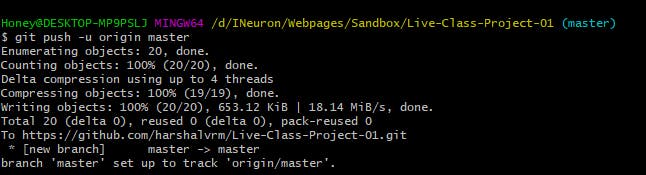
Congratulations! You have pushed your first project into GitHub and it is ready to share with the world.
I hope you find this article helpful. Please comment and share this article and tell them that GITHUB has been sorted for sure.